Thursday, December 20, 2012

buttery make-ahead dinner rolls; pinned it and did it!

my note to add a photo!


Pinned it and Did it!
These were the best rolls I've ever made.  I have to find the photo.. it's amazing.  I made for Thanksgiving dinner.  I put the dough together the night before (like 1am, wink) and left it to rise overnight.  Made them the next morning and whoola!
Note:  When I put in the pan (with sides) I put them pretty close together and that made them even better.  I know, because I tried smaller and they never ended up touching and got hard pretty quick for dinner time.

These are really so good, my cousin called me today and asked to bring for Christmas Eve.  Which reminded me that I never posted about it!  Thanks Con!
buttery make-ahead dinner rolls
makes 30 rolls
ingredients
1/4 cup warm water (115 degrees)
2 packets (1/4 ounce each) active dry yeast
1 1/2 cups warm whole milk (115 degrees)
1/2 cup (1 stick) unsalted butter, melted, plus more for bowl and pans
1/4 cup sugar
2 1/4 teaspoons salt
3 large eggs
6 to 6 1/2 cups all-purpose flour (spooned and leveled), plus more for work surface

Directions
Place water in a small bowl; sprinkle with yeast, and let stand until foamy, about 5 minutes.
In the bowl of a stand mixer fitted with paddle attachment, mix together milk, butter, sugar, salt, and 2 eggs until combined. Mix in yeast mixture.
With mixer on low speed, add 6 cups flour, 1 cup at a time, until you have a soft, shaggy dough (if necessary, add up to 1/2 cup more flour). Replace paddle with the dough hook and process until smooth and elastic, 5 to 10 minutes.  (No mixer? That's OK. You can do this with a whisk and a wooden spoon for the flour. Then knead by hand for 5-10 mis.)

Butter the inside of a large bowl; place dough in bowl, turning to coat. Cover bowl with a clean kitchen towel; let stand in a warm spot until dough has doubled in size, about 1 1/4 hours.

Butter two 13-by-9-inch baking pans. (Or 3 8x8 pans if you want smaller batches.) Divide dough in half. Roll each half into a 15-inch rope; cut each rope into 15 1-inch pieces. Press each piece into a disk, then shape into a ball. (Don't handle the dough too much or it will become tough.)

Arrange dough balls in prepared pans. (To make ahead: Wrap pans well, and freeze, up to 2 months.)
Cover pans loosely with kitchen towel; let stand in a warm spot until rolls have doubled in size, about 1 1/4 hours (2 hours more if frozen).

Preheat oven to 375 degrees, with racks in upper and lower thirds. In a small bowl, beat remaining egg until blended; brush onto rolls. Sprinkle with sea salt or herbs. Bake until golden brown, about 20 minutes, rotating pans back to front and top to bottom halfway through. Let rolls cool 15 minutes before serving.

Thursday, November 29, 2012

Dining Room chair makeover

I've wanted to do this since we bought these chairs almost 10 years ago.  As we've added kids, they just get more and more dirty.  I cleaned them, really I did.  But the very next day.. dirty.  Someone spilled something.  Someone dropped a marker/pen.  Someone, something, every day.  They are cream, I didnt expect much anyway.  BUT today, I went to Hobby Lobby and bought fabric to update them to match our space better and give a clean wipe up for all spills and drops we encounter.  I even got 40% off using a coupon from my phone, going to their website for a coupon code!  Thank you smart phone technology!


before


After!!


 Here's what I did.  Each chair took 
me about 15 min to do start to finish.


I purchase fabric that comes in 5' length (on the roller).  I can get 4 chair covers out of each yard and we have 8 chairs.  That's 2 yards.  This fabric was $21.99, but again, I used the 40% coupon!  I put it on the floor in half and cut it at the crease and did that again and again until I was the cushion size squares.


My tools.  I ended up just using the sizer stapler.  It was easy enough.  


I took the chair frame off.  It was screwed in from the bottom.  Total of 4 screws.  The frame came right off.  I cleaned it off a bit and ready to go to next step. 


 I put the fabric centered under the cushion


Then starting at the center, I stapled twice on each side of the screw hole.  Then pulling tautly  stapled the opposite side.


I went around all the side, cutting any excess off including in the corner area.


Corners are always tough.  I pulled tautly again the center of the corner and stapled


Then working on the left side, pulled taut to keep from having too much fold showing on the edge or top and stapled.  And then doing the same for the right.


Finished all the corners and trimmed any excess off and DONE.  Repeated 7 more times :0)

Thursday, October 11, 2012

Jar of good things this year


Pinned it! Did it!

This is our jar for the year 2012.  I saw this over the summer, so we added all the things we did this summer and have kept it going.  We've included movie tickets or event tickets too.  Just used strips of paper to jot down key notes to remind us of what fun we've had this year.  We re-used a peanut butter jar :0)  I need to dress it up a little, for now an post-it is holding up!

source is not found anymore, but this is the pin:


RepinEdit
I like this idea. Start the year with an empty jar and fill it with notes about good things that happen. Then, on New Years Eve, empty it and see what awesome stuff happened that year. Good way to keep things in perspective.

Wednesday, October 10, 2012

Oh the places you will go.. childhood memory


Pinned it! Did it!
Using this book as a journal, have all the people that have made an impact in your childs life from pre-school to high school write in this book.   And then give it to them at HS graduation.  I marked a page with their birth information (that I pinned and did it in a prev post) by taping inside on a page and then used a post-it to say the page was saved for Mom and Dad.  I dont know what to write just yet, and I think I need to wait till they graduate anyway.  Teachers/Staff/Activities can write anywhere in the book they want.  I put a note inside explaining it all too just in case.  I also asked them to write their name, grade/age they had her/him and the year.

I'm so glad to have found this pin.  It's such a great idea for long lasting memories.  I'm lucky enough that Megan, my oldest in 5th grade, still has all her teachers in the district to be a part of this memory.  I'll have teachers, specials (art/gym/music), principals and any others that impact their life.
original pin

I dropped them off today.  One for each of my kids.  I put them in a packing envelope so I could right on the outside of it.  One side has my info phone and email, and the other has who's book it is and what staff/teachers to pass it too.  They can then cross themselves off the list and pass around the school.  Everyone I spoke to about it was so excited about the idea, and especially those that had Megan, because they realized it's never too late.  One teacher said she had a 10y old and thought it was too late after seeing on Pinterest herself.  Not so!  Think ahead everyone.  A memory that cannot be replaced!

Thursday, October 4, 2012

Wild Kratt's have me busy, and crayons?

OK, real quick.  Have you noticed I haven't blogged in a few days?  Missed me?

I posted a few weeks ago about Timmy's party and doing a Wild Kratt theme (PBS show about animal adventures.)  Well, I put the suit on Ebay and holy moly it's selling!  I have been spending any free time on that.  So, if you know anyone.. feel free to send them my way.  Halloween is approaching!


I downloaded the eBay app on my phone and I keep hearing the "cha ching" noise.  
It's very exciting!

In addition, making recycled Halloween crayons.. but I have helpers for that.. slave labor ;0)
Is that cool or what!?  I put that on eBay too.. We'll see if that goes anywhere.


Monday, October 1, 2012

Master Shower love

Master Bath Love...
I love my shower!  This is all new for us.  It's been over a years worth of planning, saving and organizing friends to succeed.  We took some space from our closet to enlarge the shower space.  It doubled in size.  This is when you are grateful for handy friends to barter with!  I tiled this shower with a friend over a months time.  I did do the shower floor completely by myself though.  We used quartz for the bench, threshold and 2 corner shelves.  The fabricator is local, but I'll have to get out the receipt.  The glass door and surround is from Tim's Glass.  Very nice guy and great price.  I even took his bid to another location and they told me "I can't beat that price".  And it included installation.  Very good company.  Go local!

We looked for the right stone for the shower for such a long time and thank goodness for the internet!  We found a place that offered free shipping when you purchase 20 sheets of river rock.  They are heavy!  I added rock on the outside under the threshold for a little pop too.  We still have about 3 sheets left minus a few rocks, so I plan to make a waste pail from it.  It's another Pin I saw.  Excited to bring that to the room too.

This is sink and storage.  the toilet is behind this wall on the right.  Although not shown, the toilet is cool.  It's a Kohler dual flush, slim line something.  We love this and was worth the upgrade.  We didnt pay the price on the web ;)

We did a lot of research for the sink too.  We were looking for unique but not expensive.  We started with a concrete counter, and would you believe that the price tag is over 1k!  We ended up at CabinetsToGo (the creator of LumberLiquidators).  The cabinet to the  left is actually a kitchen cabinet pantry.  We had extra depth to the left of the sink, so this was a perfect fit!  And you wouldn't know the colors are not the same.  They look like a perfect match too.  Espresso (almost black).  The coolest part is the sink.  It's all glass.  One piece!  There is a separate frosted glass underneath too.  We normally have towel storage under that, but we are needing to do wash. I'm looking for baskets to put over the toilet and add towels there too.  So, I'll add a photo when that's complete.

This is inside the shower.  I didn't like the idea of having all this just sitting on the bench, so I found these stack-able locker racks at Staples and it's perfect.  Everything can still drip dry if necessary and not take up a lot of space.  It's all about the height right!

The tile was from Floor and Decor in Addison.  The wall tile is actually floor tile and we put it everywhere, including the shower ceiling.  The accent tile we made a border all the way around, and a mini one on the towel wall.  We also purchased the dark brown bull nose as a finishing touch we didn't realize we'd need and found at the last minute the store was closing as we were finishing the layout plan.  Timing, and it's perfect!  It's just the right brown and borders the shower entrance perfect.

A few other things I wanted to mention was when we did the demo for this project, I took the toilet and all doors we no longer needed to the Habitat for Humanity Restore.  They have one in Addison and Elgin, closest to us, but their website can help you with your nearby.  While I was there, I looked around at the restore and found towel hooks that were heavy duty.  I purchased 3 for $5.  They were like brand new.  In addition, the lights over sink are pendent lights that were brand new in the box they were selling for $1.  Yep, $1!  I bought 3 for the bathroom, and 3 for our someday kitchen.  We just had to get the track lighting bar for the ceiling that was $14 and done!

The mirror is a set with the shelf above it, that is to match the sink so it's from Cabinets to go too.  I put the shelf above the mirror because there wasn't enough space between where the shelf would go, and the facet.  The facet actually flows like a waterfall, it's very cool.  The vases are from a friends wedding several years back and they were the center piece.  I've held onto them in hopes of someday having the right place for them.  Initially I had them on the ledge outside the shower, but one fell and shattered, so I'm down to six.  I had seven for those of you who know me.. so I'm searching the house for a spare to get 7 back up there :)

And I managed to avoid most in the photos, but we still have the trim on the windows to do.  The baseboards and crown to install and some grout work to fix up.  And the shotty tape job has some fixing in the ceiling.  The projects just never end!  BUT I love it!

Thursday, September 27, 2012

Master Bedroom touches


 This is our master bedroom.  We really try to make it our little oasis with our own little touches.  I continue to see ideas in magazines and Pinterest to improve our space.
Todd and I made this headboard a few years ago.  We found the fabric first, designed what we liked and spent an evening after the kids went to bed and put it all together.  (stained ahead of time).  I have more photos of this project on the computer somewhere.  I'll have to post another time.  We also painted our walls a darker, more romantic color.  The ceiling is the maroon too.  Then one day while shopping at Sam's Club, I saw this bedding.  It's a perfect fit.  It came with two additional 20x20 shams that I still have not purchased pillows for.  I'll get to it.


I thought I'd share some of the pillows we have on our bed too.  I found this tonight/not tonight pillow some time ago and started giving as a bridal shower gift too.  It was in a catalog, but you can google and find many variations.  search: "tonight not tonight pillow".  And the heart pillow has a pocket that we can leave notes for each other.  This usually happens around our Anniversary or Valentine's Day.


A new update is curtains.  We have shades on these windows that came with the house, but never did anything with them.  I found these curtain panels at abc distributing.  I had the rod from our previous house unused.  I saw a pin about anchoring from the ceiling for additional height vs just above the window frame, so that's what I did. The color is perfect.  I used 3 panels.  The middle panels hangs on both sides.  I can pull them all back for light or window open breeze.  We found the lamps at Lowe's.  They had a display on brown and reds for bedrooms.  It was a purchase now because we wont find them again kinda day.  The base is very dark, probly an espresso, not quite black. The pin I used for my curtain inspiration:  from the ceiling

Wednesday, September 26, 2012

first day of school memory


 Pinned it!  Did it!
This has definitely been a popular pin type and many followed through.  I saw it all over facebook those weeks of August and September.  The original pin is below, and I do like it best.  I tells what the child wants to be when he/she grows up, and I wish I'd remembered that.  I have seen some additional memory ones with multiple questions for a scrapbook.  So, I'll make up for it there!  I plan to get more creative with my board next year too.  I like the whiteboard look, but I didn't put any effort this year... the day was all the sudden here!  Oh well, next year right?
original pin

Tuesday, September 25, 2012

Mommy and Me Journal


Pinned it and Did it!

Found this pin and loved the idea of staying connected with my 10 year old daughter.  She has 2 younger boy siblings and time can be limiting with detailed or in depth conversations that she needs.  I found this book at the dollar store, the color was perfect and the price was just right too.  I used a sharpie to write on the front.  I wrote the first letter, explaining that it was a way for us to communicate about anything she wanted to share, learn or vent about.  She took to it right away.  I leave it at her bedside when I'm done and she does the same.  It's a connection I wanted with her and I love that it's documented for us to go back to, or when she has kids I can show her what life was like "back then" :0)


Mommy and Me journal. Write letters back and forth.. leave under pillows

Monday, September 24, 2012

Baby Birth info FRAMED


Pinned it! Did it! 

This was much easier than I expected.  I have a template if you want to give it a try yourself, or I can do it for you.. Email me: brandisulak@gmail.com


The pin source that did it herself, and where she saw it on etsy is here:
http://lorrinteriors.blogspot.com/2011/07/sophisticated-baby.html

Have fun with it.  I just did all my kids and now working on some Christmas Gifts!!!

Thursday, September 20, 2012

My Mama's Guac


My Mama's Guac.  It's the best I've ever had.  My mom made this all the time and I'm not sure if she came up with the mix herself, but it's awesome.
This batch making consists of 5 avocados.  Cut in half and get remove the pit.  Use a spoon to get the avocado out.  
Do you know how to check if the avocado is good or not?  Use this trick at the store too.  One way is the firmness of the skin.  Squeeze, if it's really hard is not ready, so you can purchase and let them soften at home.  But if they are not firm, pick off the top.  Not sure what it is called.  It's like a button to the avocado.  If it's green, you are good.  If it's brown, it's too late for them :0(
Once they are all in a bowl, use the same knife you cut them in 1/2 with, to then cut them in the bowl.  just random where ever to get into smaller pieces.  You can mash with a fork too.  Sometimes I put in the blender to make super smooth, but it's not necessary.  Make sure to use a stainless or glass bowl when you do the knife cutting trick in the bowl.  The knife will make marks in your plastic bowl.  


These are all the ingredients:
(these are the basis of mine, but you can add or remove what fits your taste)
5 avocados
1.5 t. salt
1 t. garlic salt or powder/or raw garlic
2 c. salsa, fresh is best (mine is artisan fresh from sam's club) unless I can make my own
2 c. cottage cheese (secret ingr!)
2 T. or more of lemon juice, fresh is best (not shown)


Mix it all up, and do a taste test if you need to add more.  It's usually the lemon or the salt that are needed.  But you can add more of the salsa and cottage cheese to increase the ratio and have more for the quantity of avocados.  Make your avocado go farther :0)

Here's the after.  So fluffy and yummy.. These rectangle type chips are the best, my favorite, but pick your fav and dig in!

This is a great teacher and welcome to the neighborhood gift with a bag of chips or not.  I have one teacher that loves it and I give her a jar from time to time and she's not even my daughters teacher anymore.  It makes me happy that she loves and enjoys it.


enjoy!  and tell me if you try it, and like it of course!!


Flour Tortillas - from scratch

Have you ever tried to make your own tortillas?  This is the best thing I've ever done in my kitchen.  We love them and was so glad to find a recipe to start on my own.  It's very simple and you roll out like any other dough.  Once you get the hang of it, you can get it 2 batches done in 30 minutes or less!
more photos: http://www.facebook.com/media/set/?set=a.155895107799152.48260.154006707987992&type=1
(some girlfriends and I started Eco Friendly Girlfriends club, and this link is to our facebook page we share pictures and other info - feel free to like while you are there)

I use an electric mixer with the dough hook.  Adding the flour and salt together first.  Then the water until mixed well.  Adding the oil last.  I use EVOO, I like the taste better.  Once combined, I dump it all on the rolling mat, separate the dough into workable balls.  The smaller the ball, the smaller the tortilla.  A nice size in your hand would equal a burrito size tortilla.  I flour the ball and put it back into the mixer bowl until the dough is all "balled" up.  Just making it an assembly line.  Using a flat pan, start the burner to get the pan hot, on a medium heat or they will burn.   Then I take one ball out, flour the mat, flatten a bit with my hand and start rolling.  Once rolled out, put on the pan to cook.  It will bubble up and that is when you know to flip it.  While it's cooking, I'm rolling out another.  Once the 2nd is ready to cook, the bubbles have formed and I can flip it for a second or 2 cooking on the reverse side.  Take it off completely to cool and place the next one on the flat pan.  I use a Tupperware pie taker to store mine in.  My mom taught me that trick when we were growing up.  The Tupperware freezes too, so when I make enough to freeze, off they go to the freezer without having to use baggies, personal preference.
My sister in law and I made these for our end of the year gift to teachers last year, so be did baggie them up, and they do freeze just fine.  We froze them as we went along and pulled them out on the last week of school to hand out along with the recipe to make more of their own.  I wonder if anyone did?

I use flour from Whole Foods.  I have tried flour from Sams (in bigger quantity to save money) and whatever you get from the regular grocer, and noticed an incredible difference when switching to Whole Foods 365 brand.  I've also tried whole wheat, and 1/2 and 1/2.  It didn't go over as well in my house, and the 100% whole wheat was a bit hard to roll into anything (it would break).  We make a lot of quesadillas and roll-ups in this house.

The recipe I use religiously: http://www.cooks.com/rec/view/0,2357,154176-235203,00.html

I love making these so much, my kids got me a tortilla press for Mother's Day a few years ago.  I tried and tried to use it, but it's not for me.  It sits in my pantry unused.  My girlfriend has one and loves it.  So, to that.. I say, give it a try, but see if you can borrow one first :0)

Have fun and tell me if you tried it.. I really want to know!  I've even done tortilla making parties at my house to for people to see how easy it is to do!

Wednesday, September 19, 2012

No Bake - choc peanut butter w oatmeal cookies


Another, Love it! Pin it! Do it!
I saw this the other night and had all ingredients so I made them for dessert for Sunday Family Dinner.  What you see above is all that is left :0)  The batch made at least 40, but it depends on how big you make them. 

I did alter the ingredients a bit.  I used Ghirardelli choc chips (a handful) instead of the 4T cocoa.  I am also going to try with 1/2 the sugar next time too.  I used organic sugar vs the white refined.  Not sure if that made a difference, but they were a bit sweet, and I love sweet.  The author blog below is the Pinner I used,  in her discussion she mentioned how sweet they were for them too and I thought it may be a the answer.

Chocolate Oatmeal No Bake Cookies
1/2 C Butter
2 C Sugar
1/2 C Milk
4 Tbsp Cocoa
1/2 C Peanut Butter
3- 3 1/2 C Quick cooking Oats
2 tsp. Vanilla

Add the first 4 ingredients in a saucepan. Bring to a rolling boil, and boil for 1 minute. Stir in the next 3 ingredients and drop onto wax/foil paper. Let cool until set.

http://morganmoore.typepad.com/one_more_moore/2009/04/when-its-too-hot-to-bake-we-nobake.html

Monday, September 17, 2012

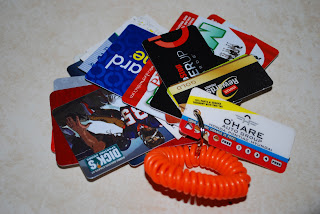
Cards on a keyring

I love Pinterest!  The ideas are flowing from everywhere about everything.  
So, I have all these boards of things I want to do, make, bake, eat, and ORGANIZE.. 
and then this one came up:

I dont want to just be a Pinner, I want to be a do'er.. so here's pin complete!

Some of my cards have a whole punched already, the mini's, but the big cards did not.  So I used my 3 hole punch, has more power and easy on the hands.  I doubled checked the back of each card to make sure I was not punching through the mag stripe or any other info I may need to read.  I love it.  Showed the hubby and dau so they know where to find everything too.  What a quick improvement!
 I have been hanging my keys from a carabiner forever, so I switched from the corded to another carabiner and clipped it on.  I'll probably have it in the pocket of my purse, but I've got options!


Friday, September 14, 2012

How to on Wild Kratt's creature power suit

Here's all the stuff I used for each shirt.
(not interested in making your own?  search on creature power suit on ebay, i'll help you out!)

 Recycle some cardboard and cut out a circle size.
                 = 3 3/4" and 4" for the center of the paw.  Either is bigger than the disk.
                 = 1 1/2" for the paw toes.
                 = 1 1/2" square for top of shirt
                 = cut two squares above and then one in half for the rectangle.
                 = clear circle (hard to see but on the right) This circle is actually too big, I trimmed once sewing was complete.  The same size as the center paw is good.
I used the clear stuff to make a pocket out of the whole thing.  they had their disks in the front for current animal, and storage in the back as we went along.  Tried using iron on stuff for the felt, but most of them came off, so I sewed them on (this example is just the iron on stuff for the paw toes)
The clear stuff is what you'd cover a table with.  I found this at ACE hardware, but have also purchased at JoAnns and Hobby Lobby.  You wont need very much, I bought 1/4 of a yard for 20 shirts.

Here's all the games we played.  I numbered afterwards vs rewriting the list.  I organized the yard to set up a few games ahead of time.  I'll post detail and photos on the games in a different post.  We had 10 disc powers in all.  2 were just given in their coloring book they picked when they left (Animal Planet kind of books along with some fun facts I got from another blogger.. I'll post later too)  We used the butterfly for snack/cake time because I made Popsicle vs the traditional cake.  They loved it!

Jewelry closet

We had a remodel project this spring for the master suite area.  While moving walls and making a wonderful shower, I took the opportunity to build myself a jewelry "case" in the wall.  Still looking for just the right mirror to complete the project, but it's awesome.  I used brass hooks w/screw ends to hang.  Accommodating necklaces, rings and bracelets.  I used a ruler and level to ensure uniformity.  Love it.  (I'll post bathroom part in another post)

Thursday, September 13, 2012

Wild Kratts party

Do you know who the Kratt Brothers are?  My kids sure do!  They love Martin and Chris.  As a result, it was our bday party them for the 6 year old.  I made the creature power suits and 10 different creature power discs.  We used them to play games during the party.  It was so much fun!  I'll post more info later.  Just wanted to get this one out there.
All of our little Kratt friends.  Should have gotten an offical group pix, darn it!


Sawyer Christian Moss!